24 February 2011

wee buns

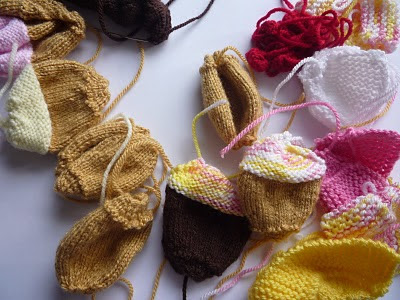
The embroidery Award finished, I've now started on my second Award for this year. I'm now doing a knitting piece. Starting with the old favourite - cupcakes. The research is such a chore but I suppose someone has to do it..........


The cupcakes were bought in the Fernleaf on the Cregagh Road.
I've done most of the knitting and now for the sewing up. I sew up pieces with mattress stitch and also sew some pieces with sewing thread in a matching colour as it is less bulky than yarn and almost invisible. Better get to it............
Bye, Ali.

20 February 2011

winter

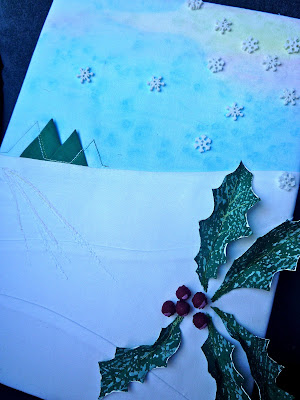
Finally I'm getting round to posting my fourth and final panel of the Four Seasons. I really like the sky in this Winter panel. I wet the fabric, applied silk paint and then sprinkled rock salt onto it. I was hoping to achieve an atmospheric snowy sky. The sky unfortunately hasn't come out to well in the photo below.


The conifers in the background of the panel are Prairie Points which are slipped into a seam and then overstitched with machine embroidery.
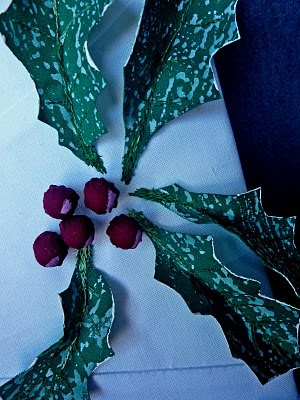
I tried to make the holly leaves have a frosty appearance. In an attempting to do this I painted cling film with white acrylic paint and then placed it unto the green fabric.
Sorry the photos arent great - the light was bad when I took them.
So thats the embroidery Award completed it just have to be marked now!
Bye, Ali.

27 January 2011

autumn

Another week another season.....I've finished Autumn now. I've included a hydrangea in Autumn and I know it is really a summer flower, but the flowerheads last much longer than the summer months and the ones in my garden turn a really deep burgundy colour. The yellow leaves are inspired by my neighbours plum tree, which overhangs our garden and the leaves turn a bright yellow colour in Autumn.
I'm whizzing through the year rightly........look out for Winter.
Bye, Ali

22 January 2011

summer

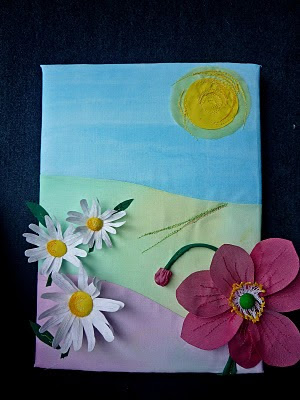
Thought you might like to have a look at another of my embroidery panels. Its just more of the same only this time with a Japanese anemone and some Shasta daisies (what else).
Ive signed up to do another 15 week award in Textiles and for this one I think I will be doing a knitting project. Autumn coming soon - hopefully.
I'm off to do a bit of sewing.
Bye, Ali.

15 January 2011

spring

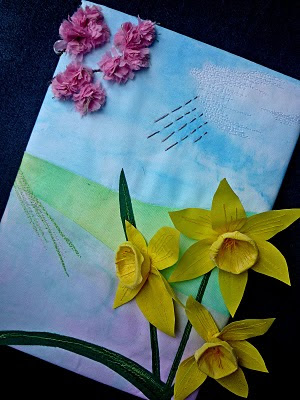
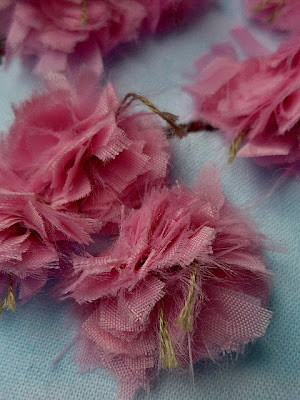
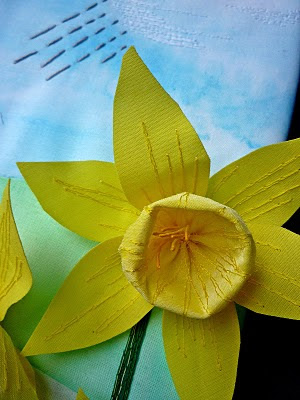
I have completed the first panel - Spring and took some photos today. The background fabric is hand painted with silk paint. Embroidery mostly takes the form of free machining, a skill which doesn't come easy to me, but I've improved a bit this year. I've also posted some photos showing details of the blossoms and daffodils.
Next is summer so hopefully I'll be have photos of it soon....wish it was spring!
Bye, Ali

13 January 2011

mannequins

Just after packing my "schoolbag" for City and Guilds tomorrow. Last week, I took this photo in the store which we share with the fashion class,...what an unusual collection of dummies!
At present I'm in a mild panic as the deadline approaches for the finishing of the machine embroidery Award. Next week Ill probably be in a major panic - I seem to be the sort of person who leaves things to the last minute and then there is a mad dash for the finish line. Ill be posting photos of my panels representing the four seasons as soon as they are finished so you can watch my progress.
Bye, Ali

23 December 2010

merry christmas

Still no let up to the big freeze. I had to put the pretty side of it on my blog. Heres the view from my back garden.
Mind you I could do without the nasty side such as frozen pipes - the washing machine froze up yesterday!
Just wanted to wish everyone a Merry Christmas - looks like its going to be a white one. Ali

25 October 2010

the north wind doth blow


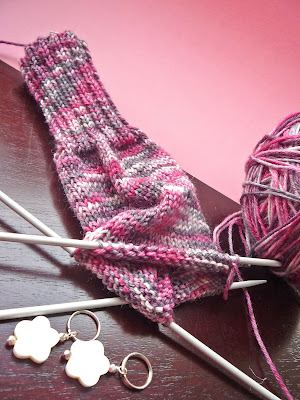
Its certainly a lot chillier here lately - definitely time to get out the winter woollies and base layers. Just the time of year to sit beside the fire and do a wee bit of knitting, so I'm on to my second ball of yarn bought at the Glen Gallery - a beautiful pink / grey Araucania Ranco Multi.


I'm knitting yet another pair of fingerless mitts for myself, using a pattern by Catherine Ryan - Fingerless Piano and Mini Mitts which can be found on her Hither and Yarn blog. I've made much use of this pattern ...one Christmas everyone got a pair, each having a different description such as gaming gloves, computing mitts etc. I like using 4ply wool for the project as the mitts are light enough to use going shopping or even inside. I'm hoping to use whats left of the skein to make a scarflette - so I'm on the lookout for a nice pattern.

17 October 2010

100% wool

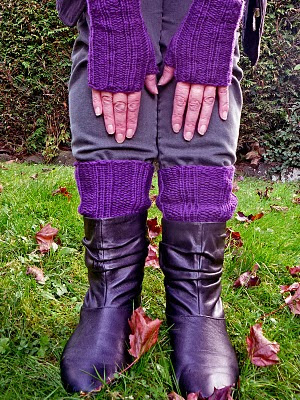
When I'm knitting my buns I would usually use 100% acrylic double knit - mainly because of cost and also because of the wide variety of colours available. I particularly like Stylecraft dk, as I think it has a nice sheen to it. I also love the multicoloured dks available such as the JC Brett ones. However on my recent visit to the Glen gallery I splashed out a bit and bought some lovely yarns. I started on the first ball, a purple Rowan pure wool aran. I knitted a pair of leg warmers to wear with boots and also squeezed a pair of fingerless mitts out of the ball as well. I found the fingerless mitts pattern on Ravelry .... Superquick Fingerless Mitts by Aemmeleia The leg warmers were knitted as a simple tube on dpns with size 6.5mm needles. The rib was k3, p3 and I casted off very loosely.
Thanks Chris for being photographer for the day!
I really should be getting on with my City and Guild stuff, oh well maybe next week.
Happy Knitting, Ali

12 October 2010

relaxation


A lot as been said about the therapeutic benefits of knitting. I'm a definite upholder of this idea...... the rhythmic nature of the process of knitting is most calming. I find as I focus on each stitch all my worries tend to gradually disappear and are forgotten. Today I spent the afternoon in the lovely October sunshine working away at some of the beautiful yarn I bought recently in the Glen Gallery a great two hours therapy and I ended up with a pair of leg warmers besides.
bye, Ali

7 October 2010

glen gallery

I heard about this place in Cullybackey in a forum on Ravelry. So had to whiz up the motorway today to have a look. They are having work done to the shop, so it was a wee bit chaotic. Despite this I could see it was a real Aladdin's Cave. Lovely yarns which I thought were only available online or on the mainland....Rowan, Louisa Harding to name a few. They also have an embroidery, felting and patchwork section. There are also workshops for knitting, crochet, hand quilting, and jewellery making. I'm so excited I'm sure I'll be back again and again. The full address is The Glen Gallery, 48 Fenagh Road, Cullybackey just outside Ballymena....well worth a visit.

5 October 2010

back to school

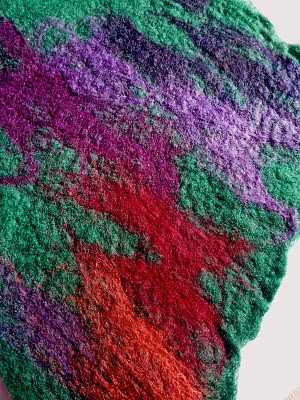
Haven't had time to blog recently with this and that. School is well and truly started and our house has returned to the school routine - packed lunches, PE kit, homework and for me the school run. I've also gone back to "big" school - that is City and Guilds - embroidery class this year. The class includes felters so the first thing we all made was a piece of felt. This is the first time I've made felt and it would seem it is not an exact science, as its hard to predict what the outcome will be. Here's a photo of how mine turned out. Someone in the class said it looked like the painting "Waterlilies" by Monet, so I was happy with that comment. It still needs a wee bit more rolling, but its a very nice craft and I'm sure Ill make some more pieces. Bye, Ali.

16 August 2010

knitting nancy

I'm always trying to find uses for the tubes a knitting nancy produces. I've written up instructions on how to make a shamrock (see below). The shamrock can be used as a pin or as an embellishment for hats, scarves, bags etc. I hope someone can make use of it.
Bye Ali.
SHAMROCK


THIS PATTERN IS COPYRIGHT PROTECTED. DO NOT REPRODUCE PATTERN. DO NOT SELL ITEMS KNITTED FROM THIS PATTERN FOR PROFIT ONLY FOR PERSONAL OR CHARITABLE USE


MATERIALS
knitting nancy or two double pointed needles - size 3.75mm (US 5)
small amounts of green double knitting (8ply) yarn
button
sharp needle
brooch back (optional)
INSTRUCTIONS
use the knitting nancy to make up a tube 40 cms (16 ins) long.
Fasten off - leaving a long yarn tail.
OR
with the dpns cast on 4 stitches and then i-cord until work measures
40 cms (16 ins).
Fasten off - leaving a long yarn tail.


Assemble the three leaves, see photos below.
Pin the centre to keep leaves in place The end of the tube is the centre of the front of the shamrock. Use the yarn tail to sew all three leaves and stalk together. Bring needle back and forward through the centre, leaves and stalk. Sew a button to the centre front of the shamrock. Pinch the inside tip of each leaf. Hold these in place with a few stitches, losing end of the yarn in the tube. Gently press the shamrock. Add a brooch back if the shamrock is to be used as a pin .


copyright Alison Hogg 2010

9 August 2010

wedding

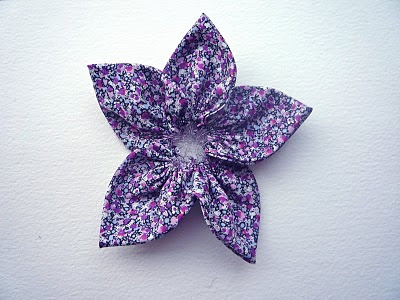
Last Friday I was at a wedding. Here's what I wore......
I decided not to include myself in the photo! The beads were made from a selection of coloured pearls, bought in Sugar Island Beads, Newcastle and I also made the flower.
As this is the wedding season Ive written up the instructions of how to make a fabric corsage - SEE BELOW. The petals are folded so there is just a little hand sewing involved. The centre is a Suffolk puff or yo - yo. So now you can make your own personalized buttonhole. Or you could use the flower to decorate a summer hat or bag.
All the best, Ali

 
FABRIC FLOWER CORSAGE

Materials
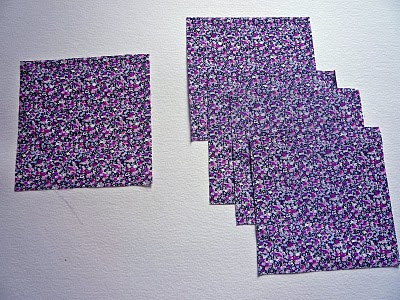
five - 4 inch squares of cotton /silk (or any fabric which would not be too bulky when folded)
one - 3 and a half inch square of a contrasting fabric
small piece of felt
needle and thread
fabric glue
brooch back
pinking shears (optional)

PETALS
1. Cut five - 4 inch squares

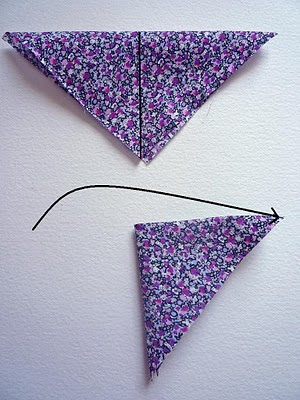
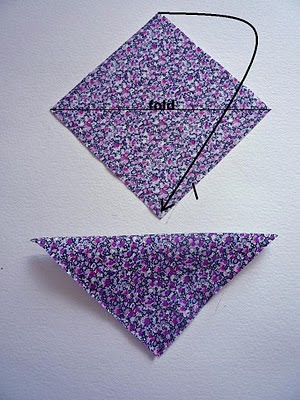
2. With wrong side facing up fold top point to the opposite point.

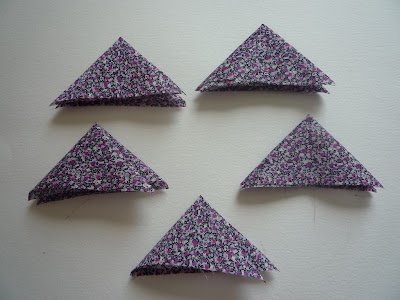
3. Fold again - point to point.

4. Repeat for each petal.

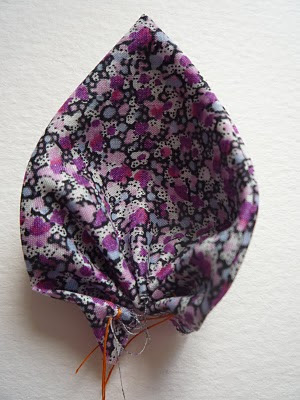
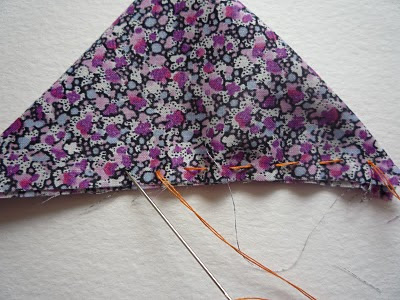
5. With a long piece of doubled matching sewing thread, sew tiny running stitches along the base of the triangle.

6. Pull thread and gather tightly end with a double stitch to stop petal unravelling.

7. Continue with the next petal - sewing and gathering. (make sure that the open folds are facing the same direction)

8. Continue until all petals are gathered. Join the last petal to the first one, to form a flower shape.


FLOWER CENTRE (SUFFOLK PUFF)
1. Cut a circle with a 3 and a half inch radius, in a contrasting fabric.

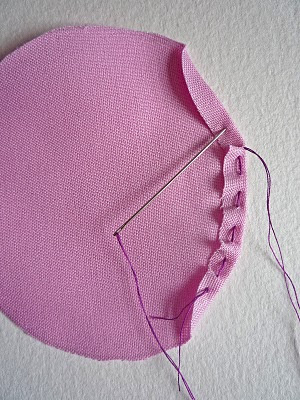
2. Turn edge of circle over a quarter of an inch and with a doubled sewing thread, in a matching colour, sew tiny running stitches close to the edge.
3. Pull thread tightly and tie off to keep the gathers secure.


ASSEMBLING FLOWER
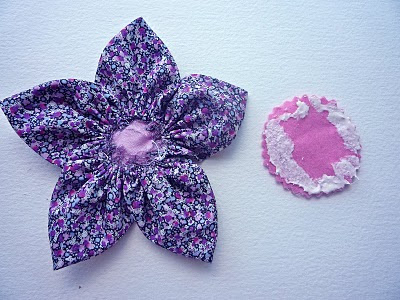
1. Applique flower centre to the petals.
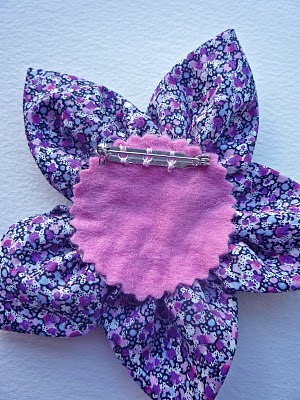
2. Cut a piece of felt with pinking shears - 2 inches in diameter and apply glue (avoid centre of felt).
3. Stick felt to the reverse of the flower to cover hole and attach brooch back.

Fabric I used for petals - Liberty Tana Lawn "Pepper"
copyright Alison Hogg 2010

4 August 2010

thanks a bunch

I just wanted to thank the four test knitters from Ravelry who volunteered to test my donut pattern. Many thanks for taking the time to test knit and for all your helpful suggestions and comments. Thanks to (in alphabetical order)..... Knitting in Hi, moilulu, remcat and vapmore.
My pattern is for sale on both my etsy shop (dollars) and my folksy shop (sterling)Bye,Ali.

28 July 2010

splat

Most of my knits are sweet and sugary and some people might even describe them as twee. For a bit of a change I knitted this fun project which I found on etsy - squashed rat bookmark, by Kookla Creations. I thought it would appeal to my son who isnt really into cupcakes!!!!
Bye, Ali