26 October 2013

free christmas MISTLETOE pattern


MISTLETOE 
THIS PATTERN IS COPYRIGHT PROTECTED
ONLY FOR PERSONAL OR CHARITABLE USE
ITEMS KNITTED FROM THIS PATTERN CANNOT BE SOLD FOR PROFIT
DO NOT REPRODUCE OR USE FOR ANY COMMERCIAL PURPOSE
Instructions are given for a full knitted version or alternatively use beads and a ribbon if preferred.
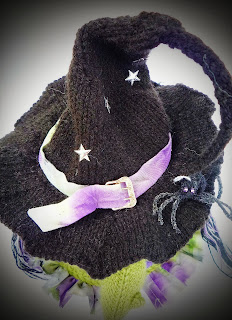
Add a loop and use as a Christmas tree decoration or make a bunch and hang from the ceiling. Alternatively tuck a sprig into the brim of a hat.

ABBREVIATIONS
st(s): stitch(es)
k: knit
p: purl
kfb: increase (knit into the front and back of same stitch)
sl: slip
psso: pass slip stitch over
tbl: through the back loop
pwt: pull wool through (thread yarn onto needle and then through stitches on needle, pull tight and secure) 

MATERIALS
two dpns size 2.75mm  (US 2)
green 4 ply (fingering) yarn
white 4 ply (fingering) yarn or white beads (aprox size 5mm)
red 4 ply (fingering) yarn or a piece of ribbon
darning and tapestry needle

LEAVES
Cast on 3 sts with green yarn.
ROW 1: kfb, kfb, k1tbl (5 sts).
Pull the sl sts tight, especially on the purl rows.
ROW 2: sl1 purlwise, p3, k1tbl.
ROW 3: sl1 purlwise, k3, k1tbl.
Rpt ROWS 2 and 3 until work measures aprox 3.5cms (1½ ins) ending in a mostly purl ROW 2.
NEXT ROW: sl1 purlwise, k1, psso, k2, k1tbl (4 sts).
NEXT ROW: sl1 purlwise, p1, psso, p1, k1tbl (3 sts).
NEXT ROW: sl1 purlwise, k1, psso, k1tbl (2 sts).
Break off yarn and place sts onto a safety pin.
  
Make another leaf, repeat pattern until 2 sts, but do not break off yarn. 

STEM
Return to first leaf and place the 2 sts alongside other 2 sts on needle (4 sts).
Keep the stitches joined to the yarn on the left.
Slide the four stitches to the other end of the needle, pull yarn along the back and continue with i-cord until desired length is reached.
If a hanging loop is required work an extra 8cms (3 ins). Which folds in half and the end sewn in place.
pwt.
  • Loose end yarns inside stem.
  • Reinforce the part where the two leaves meet with the tail at the end of one of the leaves.
  • Bring the yarn tail at the tip of the leaves up the centre on the reverse (purl) side of the leaf and loose in stem. 
  • Gently press leaves on reverse sides. Use a cool setting and do not put the full weight of the iron on the leaf. 
To form a bunch make one long main stem, sew smaller stems to this one. 
  
BERRIES (alternatively used white beads)
Cast on 3 sts with white yarn.
ROW 1: kfb, k to last st, kfb (5 sts).
ROW 2: p.
ROW 3: sl1, k1, psso, k1, k2tog (3 sts).
Cast off purlwise.
  • Thread one yarn tail round the edge of half of the berry, with the other yarn, thread round the opposite edge.
  • Pull tight and tie in a knot. Push into spherical shape. 
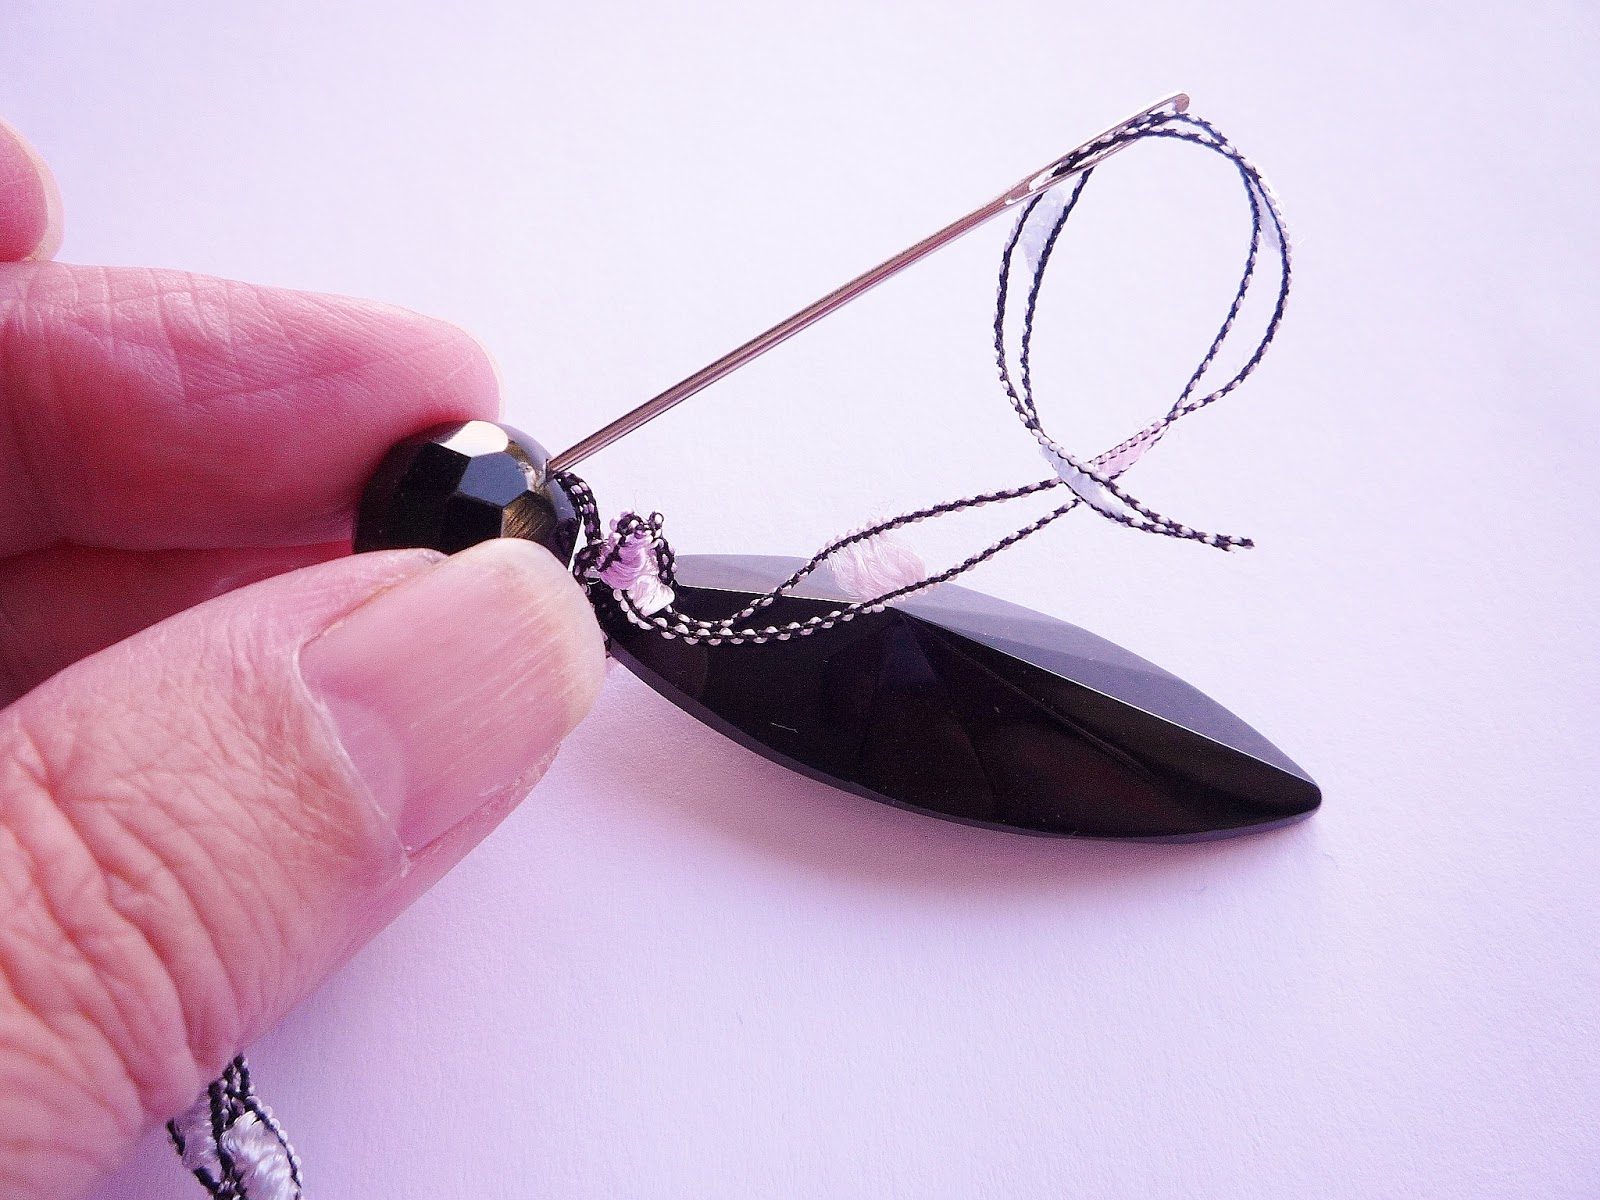
  • If using beads attach with sewing thread.

KNITTED CORD (alternatively use a piece of ribbon)
Cast on 2 sts with red yarn.
Continue with i-cord until work measures aprox 30cms (12 ins)
pwt.
Loose yarn tails inside cord.

knitted version

copyright Alison Hogg 2013

20 October 2013

once upon a time

I've been doing a wee bit of sewing lately and trying to brush up on my hand embroidery skills. I have just finished a piece for an exhibition, the title of my work is "Once Upon A Time." Sorry photos aren't great, it was a grey day when they were taken.


The text and image were printed using a paper backed fabric which I inserted into my inkjet printer. The text comes from a fairy tale - "The Princess Who Stood on her Own Two Feet". This story is part of a book "Don't Bet on the Prince" edited by Jack Zipes. The stories differ from traditional fairy tales as they portray female characters in strong leading roles.
The background was machine pieced using a crazy log cabin block. I then tacked a piece of wadding to the back to add stability for the embroidery. I really wanted to practice my hand embroidery and used the seams for lines of different stitches. Here's a few detailed photos of my attempts......


I then added a backing fabric, my hand quilting method, to hold the three layers of the quilt together was quilt in the ditch so the stitches would be unobtrusive.


Definitely more practice is required with the hand stitching, particularly the French Knots which tend to be a rather hit and miss affair!
Bysie Bye, Ali.

15 October 2013

flora fibre and fabric

I spent a very enjoyable morning wandering around the Northern Ireland Patchwork Guild's exhibition at the Island Arts Centre, Lisburn. It is the Hands Across the Border joint exhibition with the Irish Patchwork Society and the title is "Flora, Fibre and Fabric."
There were some amazing pieces.
Here's one by Anne James "Cream of the Crop". A beautiful calico quilt with a collection of patchwork flowers. My photo of one of the flowers does not do the quilt justice.


The colours in this "Floral Fantasy" quilt  by Maureen Burns just zinged. This photo of a small part of the quilt shows appliqued violas.


I marvelled at the flickering images in Irene MacWilliam's quilt, entitled "Wonder of Nature." I could not work out how she had come up with the end result.


The exhibition is on until the 19th October so still a few days to go.
Bye for now, Ali.


6 October 2013

all day breakfast

I have just recently finished my latest knitting pattern. It is another knitted food pattern - what else!
Has all the items for a good hearty breakfast and I must confess to feeling very hungry as I was writing it up, despite the fact I haven't eaten a slice of bacon or a sausage for over thirty years now.

 
As you can see the pattern includes instructions for the fried egg, slices of streaky bacon, pork sausages, mushrooms, baked beans, slice of toast and a dollop of sauce. Here's a few close ups of some of the items


Some of the items are knitted flat with two needles and some are knitted in the round with dpns. The pattern is for sale in my etsy shop and my Ravelry store.
I have ditched the knitting needles for now and have been attempting some hand embroidery , so I'll be on later with photos of my latest project.
Hope you are all enjoying the weekend, Ali.

29 September 2013

tea cosy day

It was tea cosy day in St Georges Market today. I couldn't wait to get down and see all the other cosies. There was a great selection......


Mine is in the back row. Here's a few which I particularly liked.....

"Beautiful Battenburg"
 
 
"T.E.A.D.I.S."
Nuala won three categories including Best Knitted
 
 
"Cottage Garden"
 
My "Witches Brew" cosy won the category for the "Peoples Choice" - Everyone voted for their favourite cosy - so I was well chuffed with that.
Hope everyone had a nice weekend and back to porridge tomorrow as the saying goes, Ali.

21 September 2013

witches brew tea cosy

St Georges market are running the tea cosy competition again this year in conjunction with AgeNI.
I decided to go Halloweenie this year. So meet Edna......


All the tea cosies will be on show next Sunday 29th, when they will be sold, proceeds going to AgeNI. So, looking forward to seeing all the other cosies. I did jot some notes down as I was knitting her, so I'll maybe write up the pattern sometime, although it won't be for this Halloween.
Have a great weekend, everyone, Ali
 

14 September 2013

cultural heritage

This is the title of the Northern Ireland Patchwork Guild's latest exhibition. I was in town this morning so went to have a look, as the venue is in the City Hall.
Angela McCormick had the most amazing art quilt on display. Her piece is called "Rifleman 444" and in her poignant statement, she explains that the Rifleman was her great grandfather who died in the Battle of the Somme.


A very touching memorial to him and all the others who fell in that Battle. Angela writes a blog so you can follow her work at Pin Fiddle Quilts.
The theme of the exhibition has generated a great diversity of work. I particularly liked the colourful quilt called "Journey Through Belfast 2008" by Valerie McKeown.

 
Of course after perusing the exhibition, I had to visit the Bobbin café for a cappuccino and a traybake.
 
 
The exhibition runs until the 4th October and entrance is by the side door.
Have a great weekend, Ali.


31 August 2013


LADDER RIBBON LONG SCARF
THIS PATTERN IS COPYRIGHT PROTECTED
 ONLY FOR PERSONAL OR CHARITABLE USE
ITEMS KNITTED FROM THIS PATTERN CANNOT BE SOLD FOR PROFIT
 DO NOT REPRODUCE OR USE FOR ANY COMMERCIAL PURPOSE

ABBREVIATIONS
k: knit
st(s): stitch(es)
kfb: increase by knitting into the front and back of the same st
sl: slip
psso: pass slip st over
tog: together 
rpt: repeat

MATERIALS
25 grams of a ribbon ladder yarn such as Sirdar Firefly or Zip by V and A Products Ltd
10mm needles (US 15)
two large pendant beads
beads with a large hole 

INSTRUCTIONS
Make a slip knot, leave a long yarn tail of aprox 15cms (6ins), this will be used to attach beads later.
ROW 1 : k.
ROW 2 : k1fb (2 sts).
Tug work down as you go.
ROW 3 : k.
ROW 4 : k1fb, k1fb (4 sts).
ROW 5 : k.
ROW 6 : k1fb, k1, k1fb, k1 (6 sts).
ROW 7 : k.
ROW 8 : k1fb, k3, k1fb, k1 (8 sts).
ROW 9 : k.
ROW 10 : k1fb, k5, k1fb, k1 (10 sts).
ROW 11 : k.
ROW 12 : k1fb, k7, k1fb, k1 (12 sts).
ROW 13 : k.
ROW 14 : k1fb, k9, k1fb, k1 (14 sts).
ROW 15 : k.
ROW 16 : k1fb, k11, k1fb, k1 (16 sts).
ROW 17 : sl1 knitwise, k to end of row.
At the beginning of each following row slip the first st knitwise
Continue with garter st (every row knit) until work measures 100cms (39.5ins)
or required length.
NEXT ROW : sl1, k1, psso, k to last two stitches, k2tog (14 sts).
NEXT ROW : k.
Rpt the last two rows until 2 sts remain ending on an all k row.
NEXT ROW : k2tog (1 st).
NEXT ROW : k
Fasten off leaving a long yarn tail of aprox 15cms (6 ins). 

TO ATTACH BEADS
  • Thread the yarn onto a needle which will go through the hole in the beads.


  • Then thread the yarn through the beads leaving the pendant bead until last.
  • Thread through the pendant bead and then tie a knot at the top of the pendant bead.
  • Then thread the yarn back through the beads until you reach the starting point.

  • Knot the yarn, then weave the yarn tail up through the scarf.
  • Repeat for the other end of the scarf.


  copyright Alison Hogg 2013


26 August 2013

granny square blanket

'Fraid I haven't had much time for blogging or crafting this wee while. I've been busy getting things done before my son starts school tomorrow....new uniform, appointments etc. I finished the granny square blanket awhile ago and just getting to post photos now.


I think that's enough now with one "needle" I miss my two sticks, in fact I miss having an on going project, I feel a bit unsettled as I can't just sit and do nothing. So now that school is back, I'm planning to knit up some ribbon ladder yarn I bought at the market last week.


 Hoping to make a long skinny scarf and I'll post the pattern next week sometime, if anyone has a ball of this languishing at the back of their stash cupboard and wants to make use of it.
Bye, Ali.
 

8 August 2013

thursday night down town

Tonight the City Hall was illuminated in honour of the World Police and Fire Games, which are being held in Northern Ireland at the moment. The front of the building was illuminated with a flame effect.
 
 
 The dome was transformed into a flashing blue siren with red turrets.
 
 
The photos would have looked more stunning in the dark but unfortunately due to a heavy shower, I had to hurry home. I did take one last photo before I ran for cover.


Here's hoping for better weather tomorrow, Ali

2 August 2013

fused plastic bag picture

Continuing the theme or recycling and reusing plastic bags, this post is about fusing plastic bags with a household iron, to make a "fabric". Once fused the plastic is flexible and strong and can be stitched on, either by hand or by machine.

HEALTH AND SAFETY
When fusing the plastic bags do so in a well ventilated area and use appropriate breathing apparatus

What you need
plastic bags (different weights and colours)
scissors
clothes iron
ironing board or heat resistant surface
baking parchment
angelina fibre fusible hot fix (optional)
photo or image
sewing machine (optional)


Method
1. Find a suitable photo or image for inspiration.
    My photo was of Shasta daisies taken at night time.

 
2. Cut a piece of baking parchment larger than the size the finished artwork will be and place on the ironing board.
 
3. Cut a piece of plastic for the background. Use a thick plastic bag or several layers of fine plastic bags.
 
4. Cut or tear pieces of different colours and weights of plastic bags and arrange on top of the background to form the picture. Place small amounts of Angelina fibre to add a bit of sparkle. For the flower and moon I used different weights of white plastic bag. It is possible to put a layer of clear plastic (such as a garment or dry cleaning bag) on top for added strength, but the final "fabric" will have a matte appearance.


5. Cut a second piece of baking parchment, also larger than the artwork and place on top, to form a sandwich.

6. Set the iron to synthetic or rayon and do not use the steam setting. If the iron is too hot the plastic will shrivel up and holes will develop.

7. Iron from the centre outwards, keep the iron moving for about 30 seconds.


8. Flip the whole thing over and repeat the ironing process.

9. Wait for the plastic to cool down before carefully removing the baking parchment.

DO NOT TOUCH PLASTIC WHILE IT IS STILL HOT

10. If the plastic is not totally fused repeat the ironing process.

The fine white plastic bags shrivelled up, but I quite liked the effect.

11. It is now possible to stitch, either by hand or machine to add definition to the picture. I stitched on top using free machine embroidery.


21 July 2013


PLARN BOWL


THIS PATTERN IS COPYRIGHT PROTECTED.
 DO NOT REPRODUCE PATTERN.
 DO NOT SELL ITEMS KNITTED FROM THIS PATTERN FOR PROFIT - 
ONLY FOR PERSONAL OR CHARITABLE USE

DIMENSIONS : height of bowl aprox 4cms (1¾ ins)
                      width of bowl aprox 8cms (3¼ ins)

ABBREVIATIONS
rd(s): rounds(s)
st(s): stitch(es)
rpt : repeat
k: knit
sl: slip
psso: pass slip stitch over
tog: together 

MATERIALS
3 fine supermarket bags made into plarn (see PLARN TUTORIAL click here)
4 dpns size 6.50mm (US 10½)
tapestry needle
scissors 

NOTES ON KNITTING PLARN
Plarn takes a bit of getting used to, it is quite stiff to knit with, although there is a little stretch to it. It is slow to knit up.

You can either make up a lot and roll the plarn into a ball or just make up one bag and add to it as you go along adding more plarn to the end loop.
 

BOWL
Knitted from the rim to the base.
Cast on 36 sts (cable cast on is the best method as it produces a firm rim).
Divide sts – 12 on each of the three dpns.
Rds 1 - 6: k (right side will eventually be the inside of the bowl).
Tug work down as you go, by holding the needle in left hand and pulling at the cast on edge.
Rd 7: (k4, sl1, k1, psso) rpt to end of rd (30 sts).
Rd 8: k.
Rd 9: (k3, sl1, k1, psso) rpt to end of rd (24 sts).
Rd 10: k.
Rd 11: (k2, sl1, k1, psso) rpt to end of rd (18 sts).
Rd 12: (sl1, k1, psso) rpt to end of rd (9 sts).
  • Cut plarn leaving a tail of about 15cms (6ins) and thread onto tapestry needle.
  • Pull threaded yarn through the 9 sts, removing them from the needles.
  • Pull tight.
  • Reinforce by running plarn again through the 9 sts. Make a few sts to secure, then loose plarn tail in work.
  • Loose tail at cast on edge on right side.
  • Turn reverse side outwards.
  • Pull and stretch the bowl until it is a good shape.

 
copyright Alison Hogg 2013