26 July 2011

leaf quilt

I saw this 24 Leaf Quilt on Marion Boddy-Evan's blog and loved the simplicity of the design. The tree also reminded me of a lime tree I have in my back garden. Today I have just finished my own quilt based on her design. The tree trunk is a tweed material. I have also included a blue tit and a grey squirrel in the design as they are both frequent visitors to my back garden. Not sure about the blue leaves though, I thought they were a good idea at the time, to coordinate with the blue leaf patterned curtains in the hall. Not sure about the squirrel either, I think his head is too small- but just glad to have it finished.
Here it is.....

and some details of the quilt.....


Bye, Ali.

12 July 2011

miaooooow


I spent a nice day working in the garden on the cat for my new pattern. Still have to write it up mind you. I like the idea of combining the crafts of sewing and knitting and the use of fabric and yarn. The cat has fabric inner ears and will have fabric paws. I'm also hoping to include a pattern for a fabric dress and possibly a knitting pattern for a cardi.
All at the very early stages and it is very much work in progress. I'm hoping to have it finished at the end of the summer...hopefully that is!
Bye, Ali

9 July 2011

beaded cuff


I had a free afternoon today and decided I would make up a bracelet which I saw in the Annahilt bead shop.
Ive written up the instructions for anyone who would like to have a go.
what you need
-50 (aprox) coloured safety pins
-selection of beads with holes large enough to thread on to the pin of the safety pin
-beads for spacers with holes big enough to thread onto the elastic
-elasticity (1.0), which is a soft flexible bead cord which looks like nylon but is stretch like elastic  - about 3/4 metre
-nail varnish or glue
Instructions
1. Thread beads on the open pin of the safety pin.


2. Using half of the elasticity, thread the safety pins and spacers alternatively.
The safety pins are threaded head to toe, that is, the first pin has the closure at the top, the next pin has bottom side at the top. Make sure the beaded pin is facing forward. Use a paper clip at one end to stop beads and pins sliding off. If you have a reel of elasticity work directly from the reel.
3. Continue in this way. Check to see you have enough safety pins and beads to go around your wrist. Use an even number of safety pins to continue with the "head" to "toe" sequence. 


4. Place the safety pins on a flat surface, beaded side facing down. Thread the other piece through the other side of the bracelet adding a spacer bead between each safety pin.


5. Tie one end of the bracelet with a reef or square knot. For a tutorial on how to tie this knot click here.

6. Repeat for the other end of the bracelet.
7. Put a dab of glue or clear nail varnish on the knots for extra security and trim ends. Push knot into the hole of the safety pin.


5 July 2011

soooooo cute

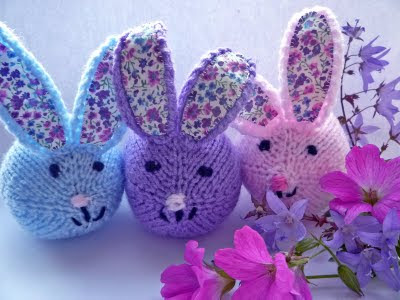
At the moment I am writing up a pattern for a knitted cat. However progress is very slow and my enthusiasm has waned somewhat. For a wee break I knitted up some baby bunnies, a pattern by Laura Long, which is in her book Knitted Toy Tales. They book is absolutely delightful and I like the way she uses fabric. Sometimes its nice just to follow someone elses pattern and interesting to see how they do things.

25 June 2011

to bead or not to bead

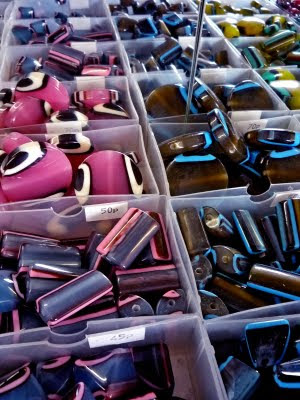
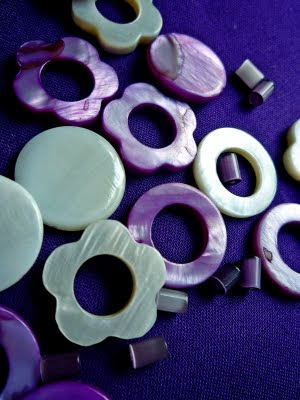
Yesterday I spent a very enjoyable morning at the Bead Shop in Annahilt. I have signed up for a jewellery course during the summer holidays and wanted to stock up on some supplies. Not only can you choose beads for a vast selection, the girl (I think shes called Lynne) will help you design and make your item of jewellery. I strongly recommend a visit, you will come away with a unique and inexpensive piece of jewellery. Don't be put off by the mundane surroundings of the Business Centre where the shop is located - inside it's a completely different world. They is opening another shop in Bessbrook, near Newry in the Richbrook Industrial Estate, come 16th August. I bought a few wee bags of beads to make up in the course, but I'm sure I'll be back to the shop again soon. Bye , ali

21 June 2011

rain stops play

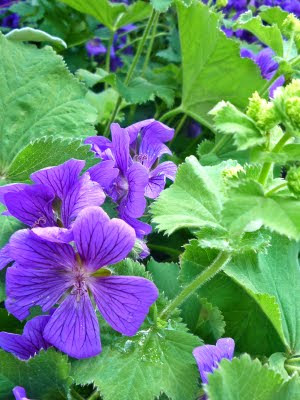
Why is it when the badminton net goes up in the back garden for the summer months - the rain comes on! Not to worry, I managed to take a few photos when the garden was bathed in sunshine last week. The rose was the first of this year.. I love the way the geranium spills over into my ladies mantle plant in a chaotic manner.... Some good news is, I passed my two City and Guilds Awards this year with distinction - I'm very pleased and relieved about that. Bye, Ali

13 June 2011

wish me luck

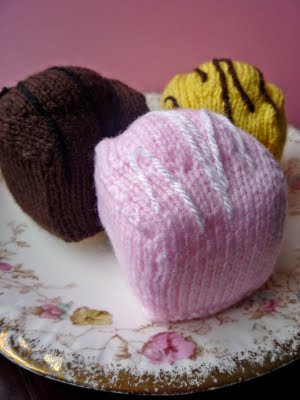
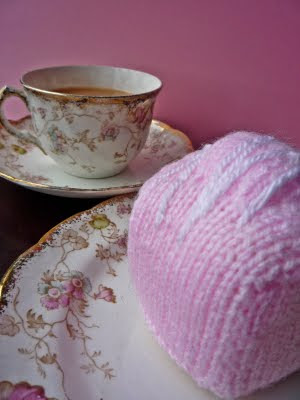
Tomorrow is the day when the external examiner comes to Belfast to mark the City and Guild pieces. She will be looking at my knitted items in particular - I have cupcakes, a gateau and these plate of buns up for scrutiny.

....so keep your fingers crossed for me.
After gaining the Certificate and hopefully a few Awards, I have signed up for the City and Guilds diploma for next year.
On a slightly different theme someone passed the link to this article
in the Daily Mail which links quilting to good health.
Ill let you know how I get on tomorrow,
Ali

21 May 2011

new pattern

I like to knit some things for my son now and then. As he is into all things army and inspired by the Mills Bomb pattern by A Butta, found on Ravelry, I decided to make up my own pattern for a knitted grenade. It is nice and soft for chucking indoors and has a removable pin. The grenade is knitted using round and flat knitting techniques. So if you don't like using double pointed needles, then this pattern is not for you. There is sewing involved, so if you don't like seaming, then this pattern is not for you. Due to its size, making up is quite fiddley, so if you don't like fiddley, then this pattern is not for you. So if there is anyone left and fancy having a go, Id love to hear how you find the pattern. Happy Knitting, ali.

GRENADE


THIS PATTERN IS COPYRIGHT PROTECTED. DO NOT REPRODUCE PATTERN. DO NOT SELL ITEMS KNITTED FROM THIS PATTERN FOR PROFIT ONLY FOR PERSONAL OR CHARITABLE USE

 
Materials
double pointed needles – 3.00mm (US size 3)
double knitting yarn (8ply) – green & grey
grey sewing thread & sewing needle
tapestry needle
drinking straw
polyester toy stuffing
sewing machine (optional)
 
Abbreviations
pwt - pull wool through (thread the yarn through the remaining stitches and pull tight to fasten)
 
GRENADE CHAMBER 4 dpns (3.00m / US 3)
Cast on 6 sts in green yarn.
Divide sts evenly between the three needles.
Rd 1 : k.
Rd 2 : kfb into each st (12 sts).
Rd 3 : k.
Rd 4 : kfb into each st (24 sts).
Rd 5 : k.
Rd 6 : (k1, kfb) rpt to end of rd (36 sts).
Rd 7: k.
Rd 8 : (k4, p2) rpt to end of rd.
Rds 9 – 11 : rpt Rd 8 - three times.
Rd 12 : (k3, kfb, p2) rpt to end of rd (42 sts).
Rd 13 : (p5, k2) rpt to end of rd.
Rd 14 : k.
Rd 15 : (p5, k2) rpt to end of rd.
Rd 16 : (k5, p2) rpt to end of rd.
Rd 17 - 20 : rpt Rd 16 – 4 times.
Rd 21 : (p5, k2) rpt to end of rd.
Rd 22 : k.
Rd 23 : (p5, k2) rpt to end of rd.
Rds 24 – 28 : rpt Rds : 16 – 20.
Rd 29 : (k1, k2tog) rpt to end of rd (28 sts).
Rd 30 : k.
Begin to stuff grenade.
Rd 31 : (p2tog) rpt to end of rd (14 sts). Break off green yarn and join grey yarn.
Next 5 rds : k.
Rd 37 : p.
Add more stuffing, push down with finger or knitting needle until grenade feels firm.
Rd 38 : (k2tog) (7 sts).
Rd 39 : k. pwt (see the Abbreviations above)
 
PIN two needles(3.00m / US 3)
Cast on 5 sts in grey yarn
Work stocking st until work measures 3.5cms /1.25ins
starting with a k row and ending with a p row.
Cast off knitwise.
With knit side facing up pick up 4 sts along the side.
 

Continue with i-cord until cord measures10cms /4ins. pwt.
 
HANDLE two needles (3.00m / US 3)
Cast on 7 sts in grey yarn.
ROW 1 : k.
ROW 2 : p to end of row.
Continue with another 8 rows starting with a k row and ending with a p row.
ROW 11 : p.
ROW 12 : p.
Continue with stocking st for another 10 rows starting with a k row and ending with a p row.
ROW 23 : sl1, k1, psso, k to last 2 sts, k2tog (5 sts).
ROW 24 : p.
Continue with stocking st for another 4 rows starting with a k row and ending with a p row.
ROW 29 : sl1, k1, psso, k1, k2tog (3 sts).
ROW 30 : p.
Continue with stocking st for another 4 rows starting with a k row and ending with a p row.
ROW 35 : p. MID POINT
ROW 36 : p.
Continue with stocking st for another 4 rows starting with a k row and ending with a p row.
ROW 41 : kfb, kfb, k1 (5 sts).
ROW 42 : p.
Continue with stocking st for another 4 rows starting with a k row and ending with a p row.
ROW 47 : kfb, k2, kfb, k1 (7 sts).
ROW 48 : p.
Continue with stocking st for another 10 rows starting with a k row and ending with a p row.
NEXT ROW : p.
NEXT ROW : p.
Continue with stocking st for another 10 rows starting with a k row and ending with a p row.
Cast off.
 
Assembling Grenade
My preferred method of seaming knitted pieces of this size is to use a sewing needle and sewing thread in a matching colour.
Pin - Cut two pieces of a drinking straw 2.5cms / 1inch long.
Slice one of the pieces lengthwise and insert inside the other straw.
With the end yarn of i-cord, join the end of the cord to the base of the i-cord to form a loop.
Place straw inside knitted rectangle and sew side seams with sewing thread and ends to enclose straw.
 

Channel for pin - Fold the handle piece to form a double layer. Sew a seam at the top just before the purl row. Use a sewing machine for this seam or backstitch. Go over the seam two or three times for extra strength. Leave a gap of about 2cms/ 0.75ins (to insert the pin) and sew a similar line of stitches. See photo below - sew the two seams along the two red lines. The channel / gap for the pin to be inserted, is between the two red lines
 

Sew round the edge of the handle, with sewing thread, leaving a gap at the channel where the pin is to be inserted.
Attach the handle to the top of the grenade.
Sew a few stitches halfway down the handle attaching it to the grenade chamber.
copyright protected Alison Hogg 2011

7 May 2011
dont get mad get even


I haven't been feeling too good this week - so I thought I would focus my efforts on typing up this fun project - a voodoo doll pincushion. Nothing sinister intended, just a bit of fun. I'm not sure how practical it is though!
As always I welcome feedback and comments about any of my patterns.
Bye Ali

VOODOO DOLL PINCUSHION 

THIS PATTERN IS COPYRIGHT PROTECTED. DO NOT REPRODUCE PATTERN. DO NOT SELL ITEMS KNITTED FROM THIS PATTERN FOR PROFIT ONLY FOR PERSONAL OR CHARITABLE USE


Casting on - 2 methods are used - single cast on method and cable method.
For instructional videos see Knitting Help
increase – knit front and back into same stitch
 
Materials
needle size 2.75mm (US size 2)
white double knitting yarn (light worsted yarn)
safety pin or stitch holder
polyester toy stuffing
embroidery thread, novelty yarn, ribbon, buttons etc for hair & features white felt

DOLL (2.75mm needles) (make 2)
Cast on 7 sts using cable cast on method, with white yarn.
Pull first stich tightly for each row.
ROW 1 : kfb1, k to last 2 sts, kfb1, k1 (9 sts).
ROW 2 : p.
Rpt ROWS 1 & 2 until 15 sts ending on a ROW 1.
ROW 8 : p.
ROW 9 : k.
ROW 10 : p.
ROW 11 : sl1, k1, psso, k to last 2 sts, (k2tog) (13 sts).
ROW 12 : p.
Rpt ROWS 11 & 12 until 5 sts remain ending on a ROW 11.
ROW 20 : p. Do not turn work, cast on 8 sts using single cast on method (13 sts).
ROW 21 : k. Do not turn work, cast on 8 sts using single cast on method (21 sts).
ROW 22 : p.
ROW 23 : kfb1, k to last 2 sts kfb1, k1 (23 sts).
ROW 24 : p.
ROW 25 : k.
ROW 26 : p.
ROW 27 : sl1, k1, psso, k to last 2 sts (k2tog) (21 sts).
ROW 28 : p.
Cast off 4 sts purlwise, k to end of row (17 sts).
Cast off 4 sts knitwise, p to end of row (13 sts).
Continue with 6 rows stocking st starting with a k row and ending with a p row.
NEXT ROW : k 6 sts, place the remaining 7 sts onto a stitch holder. NEXT ROW : p.
Continue with stocking stitch for 6 rows starting with a k row and ending with a p row.
NEXT ROW : sl1, k1, psso, k2, ( k2tog) (4 sts).
NEXT ROW : p.
Cast off, purlwise, leaving a long yarn tail.
Return to 7 sts on stitch holder, place on knitting needle, join yarn.
NEXT ROW : sl1, k1, psso, k to end of row (6 sts).
NEXT ROW : p.
Continue with stocking stitch for 6 rows starting with a k row and ending with a p row.
NEXT ROW : sl1, k1, psso, k2, (k2tog) (4 sts).
NEXT ROW : p.
Cast off purlwise, leaving a long yarn tail.
 
To Assemble Voodoo Doll
Gently press the two knitted pieces.

Place a circular piece of white felt for backing behind the face and embroider or sew buttons for features.

Place the two pieces together, knit side facing out. With the yarn ends bind together the two pieces using overcast stitch. Start at the feet and end at the “shoulders”.
Stuff the feet, body and arms. Insert small amounts of stuffing at a time, pushing into the arms and legs with a finger or knitting needle. Stuff firmly.


Continue sewing round the head, stuffing as you go.
Thread the yarn for hair through the edge of the head.

Sew heart button or felt shape to body.
 

copyright ALISON HOGG 2011
2 May 2011

tea party


The photographer Sabrina Blasingame, based in the Twentynine Palms area, contacted me to use some of my cupcakes in one of her shoots. I thought it would be a fun project so, I agreed and couldnt wait to see what she came up with. The cupcakes worked well in the tea party theme. Here are some of the photos, the little girl is soooooo cute.
Bye, Ali.

30 April 2011

sweet treats

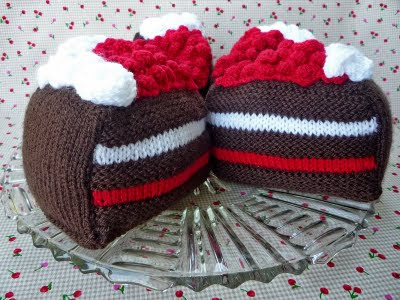
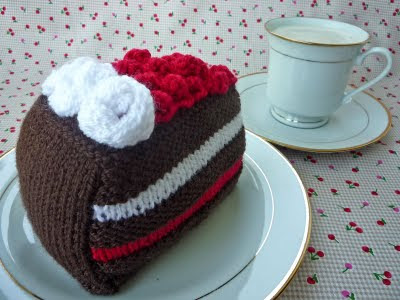
I have at last finished my knitting for the final City and Guilds Award for this year. I knitted a Black Forest Gateau with separate slices making up the cake.


Now I just have to complete the paper work such as a costing sheet, a list of materials and research into three designers.

Have to start looking for inspiration as to what I can make now....my hands cant stay idle for too long.
Bye, Ali

18 April 2011

royal wedding

I saw this book and just had to buy. It made me chuckle in the shop when I saw the wedding party all knitted up. The book is called "Knit your own Royal Wedding" and is by Fiona Goble. It includes patterns for the happy couple, the Queen, the Duke of Edinburgh, Prince Charles, Camilla, Prince Harry and the Archbishop of Canterbury. Oh and I forgot the corgis! Also included are various outfits for the guests and a make your own cardboard Palace balcony.

Best wishes to the bride and groom.

Bye, Ali

15 April 2011

magnificent magnolia


The magnolia tree in the front garden always preforms beautifully near Easter and this year is no exception. I don't know how such a delicate coloured flower gives its name to beige paint.
Hopefully the weather will be nice over the Easter holidays and I can get stuck into my neglected flowerbeds.
Bye, Ali

6 March 2011

more buns

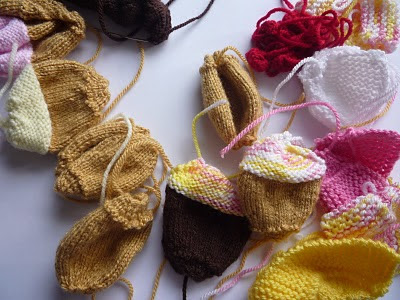
I never get fed up knitting buns and so Ive just finished another batch for the City and Guild Award. For the multicoloured yarn instead of using shop bought wool I hand painted white yarn with pink and yellow silk paint....it seemed to work ok.
Doing the research was so much fun as well, right down to the bun cases.
I took some photos of the finished cupcakes
Bye for now, ali

1 March 2011

spring flowers

Now that is officially spring my thoughts should really turn to a bit of Spring cleaning! The bright sunlight, the last few days shows up the dust and grime. However the thought of all the cleaning projects sends a shiver down my spine.
So I closed the door on the housework and headed out into the garden where there are definite signs of spring
The crocuses are in bloom............


As are the snowdrops......
Bye Ali,

24 February 2011

wee buns

The embroidery Award finished, I've now started on my second Award for this year. I'm now doing a knitting piece. Starting with the old favourite - cupcakes. The research is such a chore but I suppose someone has to do it..........


The cupcakes were bought in the Fernleaf on the Cregagh Road.
I've done most of the knitting and now for the sewing up. I sew up pieces with mattress stitch and also sew some pieces with sewing thread in a matching colour as it is less bulky than yarn and almost invisible. Better get to it............
Bye, Ali.